this year's event:
history of the ooopen :
archives:
Ooopen 2006 - Lake Placid, NY
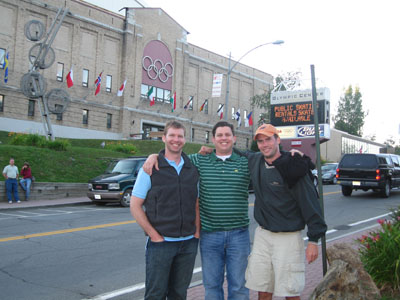
"Do you believe in miracles?"
The 2006 Ooopen Championship
Friday, August 11 through Sunday, August 13.
Ooopen Course Guide
Saturday, August 12: Round 2
Lake Placid Resort and Golf Club: Links Course
The Links course at Lake Placid was designed by Scottsman Seymour Dunn in 1909, so there’s quite a bit of history associated with the course. In general you will find hilly fairways, few trees, and large greens often surrounded by a ring of shallow bunkers. The course is unique in that it features five par 3s of varying length.
(My memory of this course is slightly worse, so some descriptions may actually refer to other holes… my apologies).
| Hole | Par | Blue Yardage | Handicap |
| 1 | 4 | 416 | 5 |
| 2 | 3 | 202 | 11 |
| 3 | 5 | 532 | 9 |
| 4 | 3 | 177 | 13 |
| 5 | 5 | 526 | 1 |
| 6 | 4 | 407 | 7 |
| 7 | 4 | 451 | 3 |
| 8 | 4 | 346 | 15 |
| 9 | 3 | 136 | 17 |
| 10 | 4 | 455 | 4 |
| 11 | 3 | 125 | 18 |
| 12 | 4 | 345 | 14 |
| 13 | 5 | 459 | 10 |
| 14 | 3 | 184 | 12 |
| 15 | 5 | 552 | 2 |
| 16 | 4 | 346 | 8 |
| 17 | 4 | 357 | 16 |
| 18 | 4 | 381 | 6 |
| Total | 71 | 6397 |
Hole 1: Elevated tee shot to a wide, undulating fairway. There is a patch of high, wispy grass on the left which will gobble up errant drives, and the driving range protects the right side. Green is slightly elevated and protected by a ring bunker. Left side of bunker has a grass island which can be difficult to shoot over.
Hole 2: Nice time for a long iron. This longish par 3 plays slightly uphill. Green is fairly large and slopes strongly from back to front and right to left. The green is protected by a ring bunker on the sides and back, but is open up front.
Hole 3: Tough par 5 with drive over gorse. There is a thick line of trees on the right side; treat this as a boundary, as there is no room on the right for your drive. Left is good off the tee, even though the hole bends slightly right. The second shot plays back up a slight hill toward a green, with gorse on left. The green is open in front if you try reaching in two. Over the green is pretty bad.
Hole 4: Pretty simple par 3. The green is protected by a ring bunker, and missing right is better than missing long or left depending on where the flag is.
Hole 5: Trust the aiming stick. This par 5 starts off with a pretty intimidating drive, as anything short will be on a big upslope, and you won’t be able to see anything long actually land. That said, the fairway is reasonably wide, and left is a better miss than right. Once you reach the top of the hill the hole becomes straight forward, with a fairly flat green and no significant bunkering.
Hole 6: A long par 4 down the hill. The hole looks pretty straight off the tee, but the fairway kinks to the left a little, so straight drives often end up in the rough. Trust the aiming stick, not the tree that looks like it’s on the edge of the fairway (it’s actually 10 yards in the rough). The green has a bit of a false front and a big fall off to the right side, so missing left is the right play.
Hole 7: Swing hard. At 451 yards this is probably the most difficult hole on the course. The fairway is relatively wide and straight. About 300 yards off the tee the hole bends slightly left, with a big mound on the right side protecting the 8th fairway. This is a bad place to be. The green is narrow and deep, slopes back to front, and is surrounded by a ring bunker. Probably the toughest long iron shot all day.
Hole 8: A bit of a let-up hole. Drive plays slightly uphill. There are trees on the right side which could impede a 2nd shot, so left is a better miss. The green angles back and to the right, and features a strong back to front slope and a bunker protecting the front right. Missing long leaves a tough up and down.
Hole 9: Easiest hole on the course. It’s a short par 3 with a narrow bunker in front and a big bunker on the right side. The green is fairly shallow, so get your distance correct.
Hole 10: Trust the aiming stick. This hole plays shorter than the distance on the card, but the drive is blind and the landing area isn’t particularly large. The left and right hand sides of the fairway are protected by long, narrow mounds with a sliver of bunker between the mound and the fairway. The green is protected by a sliver of bunker in the front. Tough hole.
Hole 11: This is a short, downhill par 3. Bunkers protect the front, left, and rear of the green and the right side is protected by a steep bank, so finding the green is important. The back bunker can be really bad. The green is in fairly bad shape in the front right, so don’t expect that as a pin position.
Hole 12: This is a pretty easy driving hole. The right side is a course boundary, so don’t put it in the trees (there is plenty of room left). Fairway is pretty bumpy, but you should have a short iron or wedge into the green. The green is pretty well sloped, so make sure to get on the right level to prevent a nasty putt.
Hole 13: Birdie time! This is a short par 5 (470 yards) that doglegs slightly to the right and offers a generous fairway. The green plays slightly uphill from the fairway, and isn’t particularly well protected.
Hole 14: Maybe the toughest par 3 on the course. There is a big mound on the left side of the green which gives the illusion that left is bad. However, aiming right either puts you in a bunker or leaves you with a lengthy pitch. There is a bunker on the left to watch out for, so short and middle is the best play. The green really slopes near the edges.
Hole 15: The hardest of the par 5s features the only water on the course. The drive is pretty straightforward, with right being bad (trees) and left being okay. What you don’t see off the tee is a big pond that protects the right side for the 2nd shot. I don’t think it is reachable off the tee, but might be for big hitters if the wind is blowing. The pond makes the 2nd shot fairly tough, as a short lay-up needs to stay well left, while the longer lay-up must be sure to clear the pond. The green is elevated from the fairway and is protected by a bunker on the right side.
(Note: I might be mixing up #16 and #17, and the difference is fairly important off the tee.)
Hole 16: This starts a series of fairly similar holes: elevated tees playing to downhill fairways playing to uphill greens. The 16th is short but fairly difficult, as the tee box aims you straight when straight is bad. You want to aim left, as that’s where the fairway is. The aiming stick should help, but missing far left is much, much better than missing a little right. Green is elevated from the fairway and is fairly undulating.
Hole 17: This pretty simple hole is laid out in front of you… no blind tee-shots, fairly minor elevation changes. The elevated tee makes it play shorter than its listed length of 357 yards. Fairway slopes right to left, so watch out for positioning.
Hole 18: A great finished. Elevated tee leaves a downhill shot to a wide, right-to-left sloping fairway. It’s tough to find a flat lie on the fairway. The second shot is significantly uphill to the smallest green on the course. The green is protected by steep slopes to the right and in the front. Don’t go long, as your ball will be in the road.
Saturday, August 12: Round 3
Lake Placid Resort and Golf Club: Mountain Course
This course is a doozy. It was redesigned in 1931 by Alister Mackenzie, who designed another course called “Augusta National”. The name “Mountain Course” is apt, as the course is very hilly, offers multiple blind shots, and nary a flat lie. The greens are very small, which only increases the challenge.
| Hole | Par | Blue Yardage | White Yardage | Handicap |
| 1 | 4 | 398 | 368 | 7 |
| 2 | 4 | 380 | 370 | 5 |
| 3 | 4 | 413 | 383 | 1 |
| 4 | 3 | 216 | 216 | 11 |
| 5 | 4 | 297 | 289 | 15 |
| 6 | 4 | 331 | 296 | 13 |
| 7 | 5 | 546 | 516 | 3 |
| 8 | 3 | 156 | 148 | 17 |
| 9 | 4 | 388 | 356 | 9 |
| 10 | 5 | 552 | 512 | 12 |
| 11 | 5 | 601 | 496 | 2 |
| 12 | 3 | 209 | 202 | 10 |
| 13 | 4 | 407 | 407 | 4 |
| 14 | 4 | 242 | 231 | 16 |
| 15 | 3 | 174 | 156 | 18 |
| 16 | 4 | 370 | 362 | 14 |
| 17 | 3 | 221 | 209 | 6 |
| 18 | 4 | 393 | 343 | 8 |
| Total | 70 | 6294 | 5860 |
Hole 1: An intimidating first tee shot. If you top it you could kill someone trying to get their cart. If you hit a quick slice you can retrieve your ball from the pro-shop. The tee box is elevated so you have a great view of the fairway, which is amazingly hilly and slopes strongly right to left. You have to hit a bomb in order to find flat ground. Missing way right will land you in someone’s back yard, however, the course has a sign posted giving a free drop from there. The 2nd shot continues downhill into a small green with lots of subtle breaks.
Hole 2: Welcome to your first blind shot of the day. Your drive is straightforward, with an elevated tee hitting to a sloping fairway. There is trouble on the right (a road), and some trouble on the left (a tree). From the landing area the hole goes up a very steep hill that crests before sloping down to a tiny green with a pond back and to the right. It is worth driving up to see the green and pick out a target, as the aiming pole is only a little helpful. The green is quite small, but no trouble other than the pond (which really isn’t in the way).
Hole 3: The hardest hole on a hard course. The tee is slightly elevated, and the fairway is fairly generous (although the road is in play on the right). The difficulty is that the fairway kind of stops about 225-250 yards off the tee, and it starts going up a big hill. Hitting it short of that berm leaves you with a 200 yards shot up the big hill to a smallish green. The green slopes strongly from back to front.
Hole 4: No breather. This long par 3 plays down hill to a fairly big green with a reasonable amount of space around the green to accept misses. The green has lots of subtle slopes.
Hole 5: Finally a hole that you feel you can take advantage of. The tee box is set back in a narrow shoot, but the fairway actually has a fair bit of space. Right is a bad miss (trees). The 2nd shot plays uphill to a shallow green with a road running behind it. The green is protected by a bunker in front, and has some serious undulations, especially on the front of the green.
Hole 6: Big, sweeping dogleg right that goes up a steep hill. The landing area is fairly wide, and the drive isn’t particularly tough. The 2nd shot is up the hill to flat, narrow green. It’s tough to take enough club to get to the back pin position. Don’t miss right on the 2nd shot, as the tree line creeps in towards the green.
Hole 7: This par 5 starts with a shot from an elevated tee to a flat, straight fairway. There is a tree line on the right, and a handful of trees on the left, but there is plenty of space to hit driver. The 2nd shot is maybe the dullest on the course. The green is pretty small, and there are two huge mounds guarding either side. Don’t be left or right of those mounds, as you’ll either have to pull off a flop shot or play to the back of the green. Oh yeah, there are bunkers on the outside of the mounds for extra fun!
Hole 8: Finally a nice, mid-length par 3. Green slopes from back to front, and is protected by bunkers in the front and a steep drop-off in back.
Hole 9: The end of the front 9 starts with an uphill tee shot to a fairly wide fairway. The fairway is flanked by a bunker down the left side, and there is a crossing bunker guarding the right. From the landing area the hole rises steeply to a plateau where the small green resides; the 2nd shot is nearly blind, so you’ll need to trust the landing area.
Hole 10: The first of back to back par 5s starts with a forced carry drive to a downhill fairway with plenty of room on the left and no room on the right. The 2nd shot is more of the same, with some gorse on the left catching any hooks. The green plays well downhill for the approach shot, and is protected by mounding on the front right and trees long.
Hole 11: A 600 yard beast if the prevailing wind is blowing. The tee shot plays slightly up hill; the trouble on the left (a bunker and gorse) is pretty far left, and there is a decent amount of room to hit driver. The 2nd shot needs to be long in order to have a reasonable club into the green, and the rough gets pretty thick, so it should be accurate as well. The green is very small, and has a bunker protecting the front left.
Hole 12: A long, blind par 3 that plays slightly downhill and probably down wind. You’ll need to trust the aiming stick. The visual from a tee is a huge bunker, but it shouldn’t come into play. There is plenty of room between the bunker and green, and since long = trees it’s best to come up a little short.
Hole 13: A big, long par 4 that goes up a hill. The fairway is plenty wide, and you’ll need to hit it a ton to have a chance at hitting iron into the green. The 2nd shot is blind, so trust the aiming stick. There is plenty of room around the green, but left is a better miss than right. Once again, the green is pretty small, but otherwise lacks protection.
Hole 14: This is the strangest hole on the course. Even though it plays up hill it should be reachable for some off the tee at 242 yards. That said, the green complex is very difficult, with deep bunkers protecting the front and right, and trees protecting the left. Left is a terrible miss, and there is plenty of room right. Laying up isn’t the worst shot either.
Hole 15: Just when you had enough of blind shots down a hill, here’s the most frustrating. The green is completely hidden from view by 2 giant mounds. The shot plays well down hill, and there are two aiming sticks (one near the mounds, one behind the green that’s probably 75 feet high). A frustrating shot, but short is the better miss.
Hole 16: The tee shot plays slightly downhill and the final landing area is blind. Hole kinks a little left, and left is definitely better than right. The 2nd shot plays further downhill to a very small green with junk long and right.
Hole 17: This par 3 plays about 240 yards… it’s 220 but plays up a huge hill and into the prevailing wind. The green is invisible from the tee. The green is slightly larger than average for the course, and there is a bunker behind it. Maybe the most interesting feature is that you have to walk across the 17th green to get to the 18th tee, so bring both your putter and your driver.
Hole 18: Tough finisher. The tee shot goes back across the 17th green up a long, gentle hill. Fairway is fairly undulating, so expect a funky lie. Misses to the right leave you down the side of embankment with a very difficult (if not impossible) shot at the green, so hitting the fairway is important. The hole gets steeper as it approaches the green, which is protected by a big, deep bunker in the front left, the right, and the rear.
Sunday, August 13: Round 4 - Champions Day
Saranac Inn Golf Course
The Saranac Inn Golf Course will host the final round of the 2006 Ooopen Championship, an honor for which it is more than worthy. The course was designed by Seymour Dunn, a noted Scottish course architect. As one would expect from a course in the mountains it is quite hilly, but for the most part it is straightforward and fair. The holes offer a nice mix of lengths, allowing both aggressive and conservative shots.
Unless noted otherwise, the course has very healthy (read thick) rough, which makes long shots pretty difficult depending on lie. The fairways and greens are in perfect shape. Bunkers seemed to be in good condition with rather thick, chunky sand.
| Hole | Par | Blue Yardage | White Yardage | Handicap |
| 1 | 4 | 415 | 408 | 3 |
| 2 | 5 | 560 | 553 | 5 |
| 3 | 3 | 135 | 117 | 17 |
| 4 | 4 | 334 | 329 | 9 |
| 5 | 4 | 441 | 436 | 7 |
| 6 | 4 | 387 | 382 | 15 |
| 7 | 3 | 230 | 225 | 11 |
| 8 | 4 | 305 | 300 | 13 |
| 9 | 5 | 515 | 476 | 1 |
| 10 | 5 | 490 | 462 | 12 |
| 11 | 4 | 407 | 402 | 10 |
| 12 | 4 | 412 | 407 | 8 |
| 13 | 4 | 332 | 327 | 16 |
| 14 | 3 | 155 | 136 | 18 |
| 15 | 4 | 358 | 353 | 14 |
| 16 | 3 | 200 | 195 | 6 |
| 17 | 4 | 423 | 418 | 4 |
| 18 | 5 | 532 | 527 | 2 |
| Total | 72 | 6631 | 6453 |
Hole 1: A tough opener. A wall of trees protects the right side of the hole from the driving range. The hole has a valley running through the landing area, and thus it is unlikely you’ll have a flat lie for the 2nd shot. That shot will likely be a mid or long iron into an elevated green that slopes heavily from back to front and is protected by a small bunker in the front left. Back pin positions will require at least one extra club, and pitching up from just off the green is better than putting from just on the green.
Hole 2: Long par 5, slight dogleg to the left. Definitely a three shot hole. Some trees down the left off the tee, and some junk to the right on the 2nd shot, but generally not a lot of trouble other than the length. Green is fairly small and flat, maybe a bunker on the left.
Hole 3: Short par 3 plays uphill, maybe an extra half to full club. Short is bad, as is right. Green slopes from back to front, leaving the possibility for a fast putt if you go long.
Hole 4: Looks like a let-up hole, but can be screwed up. Line of trees down the right protects the 5th fairway, and while you can play through them, it brings a lot of trouble into play. Fairway slopes hard left, so again a flat lie is a tough find. Green is mostly encircled by a shallow bunker (a favorite design feature of Dunn). Very tricky green, so leave your 2nd shot in the right place.
Hole 5: Bombs away! Long par 4, but like #2 the length is the hole’s only protection. Some tall wispy grass on the far right collects errant 2nd shots or chip-outs… it’s tough to find a ball if it goes in.
Hole 6: Pretty easy driving hole… some trees down the left protecting #5 fairway, but nothing too severe. Hole plays slightly downhill. Green is encircled with a narrow, shallow bunker except for a small opening in the middle. Relatively straightforward green.
Hole 7: A beast of a par 3 at 226 yards, maybe a smidge downhill. Right side of green is impossible to see due to a massive mound of earth about 190 yards off the tee. There’s a lot of room around the green to catch errant shots, but from the tee it looks like there is no room. This is compounded by the fact that you are hitting a long iron or fairway wood into the green. Trust your shot, make a good chip, and play for a par or bogey.
Hole 8: A fun hole to get after it. Pretty short, and other than the trees on the right (a course boundary) there isn’t a lot of trouble off the tee, so take a run at the green. The real challenge is making sure you are on the right part of the green, as it is heavily sloped and divided into several different segments; putting in any one of those segments isn’t bad, but putting to another segment is treacherous. Green is protected short right by a bunker.
Hole 9: Birdie hole. Bomb the driver as the fairway is pretty wide and there is lots of room on both sides (more on the left than right). The second shot plays slightly downhill. Green has 3 distinct tiers, with the back tier being very narrow (I’d be surprised to see a blue flag) and the front tier having a slight false front. Once you are hole-high your putt should be pretty flat. Two very large and relatively shallow bunkers flank either side of the green.
Hole 10: Even better birdie hole. It is shorter than #9 but plays uphill. Tee box puts you at a weird angle relative to fairway; it looks like you have to hit a little draw, but go ahead and bomb it straight. Missing right is better than missing left. The second shot plays uphill, but you can roll up onto the green. Green slopes from back to front.
(Food is available off the 11th tee, although the cart girl will bring you anything you want anywhere on the course.)
Hole 11: Stern par 4. Drive is down a hill, so hitting the fairway is rewarded. The second shot plays way uphill, so take at least one extra club if not two. The green has a bit of a false front which makes the red pin tough to get close to, and there is a bunker protecting the left side.
Hole 12: Big sweeping dogleg right. Drive it down the hill, but watch out for the heather grass on the right, which almost acts like a water hazard. Trees and regular rough guard the left side of the fairway. The second shot is again WAY uphill, and is probably the blindest shot on the course. A bunker guards the left of the green, and there is a road running behind the green, so short and right is the good miss.
Hole 13: Walk across the road and hit your drive back across the road (an interesting design feature… there are several places on the course where you could hit an oncoming car). Drive plays uphill to a crest, so you can’t see the green from the tee. Big tree guarding the right side of the fairway, so left is the better miss. Green is surrounded by a ring bunker and slopes pretty strongly. Plays harder than it’s handicap would indicate.
Hole 14: Pretty straightforward par 3. Short iron into a green that has a big bunker short and right and lots of slope from right to left and back to front.
Hole 15: Short dogleg right. Right isn’t as bad of a miss as it looks off the tee, as there is room behind the trees you play over off the tee. Green is sharply uphill from the fairway. There is more room on the green back and left than appears from the fairway (actually, you can’t see any of the green from the fairway).
Hole 16: Hope you have a 3 shot lead. Long par 3 goes over water (not in play) to an elevated green. No bunkering, but green is up on a plateau making chips a delicate affair. All the trouble on the hole is visible from the tee.
Hole 17: Tee box aims you to the right of the right side of the fairway, so take your line and shift another 5-10 degrees left, as there is no trouble there other than a stray tree. Right is dead off the tee. Drive is slightly downhill. Green is set down in a little gulley, with two small bunkers protecting the front.
Hole 18: Tough but fair finisher. Tee shot is downhill to a fairway that sweeps to the right. Left side of hole is lined with trees protecting #1 fairway, while the right side has OB stakes up most of its length. Hole plays uphill after the drive. Green is protected by a deep bunker short left; so right is not that bad of a miss.
-----
Rules in force for the weekend:
Tees – Before each match all opponents will agree on which set of tees to use for which players.
OB/Yellow-staked water hazards -- These will be played as lateral water hazards, which means you have 5 options for dropping (all include a 1 stroke penalty). You MAY play a shot out of hazards. You MAY NOT play a shot from OB UNLESS your opponent allows it, but they are under no obligation to do so. If you must take a drop, you may use a designated drop area or one of the options described below (by GolfOnline):
The first option is going back and playing a ball as nearly as possible at the spot from which the original ball was last played. The second allows the player to drop a ball behind the water hazard, keeping the point at which the original ball last crossed the margin of the water hazard directly between the hole and the spot on which the ball is dropped, with no limit to how far behind the water hazard the ball may be dropped. To clear up a common misconception, it should be noted that this is not the same as the line of flight.
The options available only for lateral water hazards are dropping a ball outside the water hazard within two club-lengths of and not nearer the hole than (i) the point where the ball last crossed the margin of the water hazard or (ii) a point on the opposite margin of the water hazard equidistant from the hole.
Death Mulligan -- The death mulligan is so named because of its strategic nature. It may be used for any shot that is not a putt. The player choosing to take the mulligan may wait until his opponent has hit their next shot before declaring a mulligan. That said, the player must decide on using the mulligan PRIOR to leaving the area where he would play the next shot. For example, a player may not ride from the tee to the fairway to examine their position and then return to the tee to hit a mulligan. Once declared a player MUST take the result of the mulligan stroke.
Tiebreaker -- Should the matches end 4-4 the following tiebreakers will be used. First, we’ll use cumulative scores on par 3s for the singles matches. Second, cumulative birdies made during the singles matches. Third, we Rochambeau.
Rain – Should it rain during any match, the teams will decide whether to play through the rain or wait it out. Should rain or lightning result in the failure to complete a match, the current result of the match will be used if at least 12 holes have been completed. If less than 12 holes have been completed, the match will result in a draw, regardless of current score.